


How to Safely Remove Seedlings from Trays: Tips and Techniques for Healthy Transplanting
2025-02-13 08:31:27
Introduction: The Importance of Proper Seedling Removal
Transplanting seedlings from trays to their permanent growing spaces is a crucial step in gardening. How you remove seedlings from trays directly affects their survival rate and long-term health. Proper technique ensures that the delicate roots are not damaged, and the seedlings can adapt well to their new environment. This guide will walk you through the best methods for safely removing seedlings from trays, ensuring a smooth transition for your plants and enhancing their chances of thriving in their new homes.
Step 1: Timing is Key – When to Remove Seedlings
The first step in successful transplanting is knowing when to remove your seedlings from the tray. Seedlings should be removed once they have developed their first set of true leaves and their roots are beginning to fill the tray cells. This is typically around 2–4 weeks after germination, depending on the plant species.
· Tip: Be sure that the seedlings are strong enough to handle the move. If seedlings are too young, they may be too fragile to transplant, leading to transplant shock. Conversely, if they are left in the trays too long, they may become root-bound, which can stress the plant and stunt its growth.
Step 2: Prepare Your Transplanting Space
Before removing your seedlings, prepare the space where they will be transplanted. Whether you are moving them to a garden bed, larger pots, or another container, make sure the new space is ready for the seedlings. If transplanting outdoors, ensure the soil is properly amended, and the weather conditions are favorable (not too hot or too cold). For container gardening, ensure the pots have drainage holes, and use a high-quality potting mix to support root growth.
· Tip: Water the seedling tray and transplanting area a day before transplanting. This helps to minimize stress on the seedlings and ensures the soil in both areas is moist enough to prevent transplant shock.
Step 3: Gently Loosen the Seedling from the Tray
Now that your transplanting area is prepared, it’s time to remove the seedlings from their tray. To avoid damaging the delicate roots, be gentle when handling the seedlings. Start by gently tipping the tray on its side to loosen the seedlings. If the tray has multiple cells, it may be easier to remove each seedling one by one.
· Tip: If the seedlings are stuck, gently press on the bottom of the tray to loosen the roots. You can also use a small, blunt tool, like a wooden stick or a pencil, to push from the bottom of the tray cells. Avoid pulling directly on the seedling as this can tear the roots.
Step 4: Handle Seedlings by Their Leaves, Not Roots
When removing seedlings, always handle them by their leaves, not the stems or roots. The stem is delicate and can be easily damaged, leading to a weakened plant. Gently grasp the seedling by the leaves or cotyledons (the first leaves) and lift it from the tray. Hold the plant gently but securely to avoid stressing the root system.
· Tip: If the seedlings are small, you can also use a pair of tweezers or your fingers to gently pinch the leaves and lift them. Be careful not to pinch too hard and damage the seedling.
Step 5: Examine and Trim the Roots if Necessary
Once the seedlings are removed from the tray, examine their root systems. Healthy roots should appear white or light-colored and should not be overly tangled. If the seedling has become root-bound (when the roots are growing in a circular pattern around the edge of the cell), gently loosen the roots before transplanting. If necessary, trim any damaged or overly long roots to encourage better root growth once transplanted.
· Tip: Do not trim too much of the root system, as this can stress the seedling. Only trim the roots that are damaged or excessively long.
Step 6: Transplant the Seedling into Its New Location
Once the seedlings are prepared, place them in their new location. Whether you are planting them in the garden or in a larger container, ensure that the seedlings are placed at the same depth they were in the tray. If you are transplanting into the soil, dig a hole just large enough to accommodate the seedling's root system.
· Tip: After placing the seedling in its new home, gently fill the hole with soil, making sure the seedling is stable. Press the soil around the base of the plant to eliminate air pockets, but avoid compacting it too tightly.
Step 7: Water the Seedlings Immediately After Transplanting
Once your seedlings are in their new home, water them immediately to settle the soil around their roots. This helps to minimize transplant shock by ensuring the roots make good contact with the surrounding soil. Make sure to water gently so as not to disturb the newly transplanted seedlings.
· Tip: Water the seedlings deeply, but ensure that the soil drains well to prevent waterlogging. It’s important not to overwater, as this can cause root rot.
Step 8: Provide Proper Care Post-Transplant
After transplanting, provide the seedlings with proper care to help them settle in and grow. Place the seedlings in an area with adequate light, either outdoors with proper sunlight or under grow lights indoors. Keep the soil consistently moist, but not soaked, and protect the seedlings from extreme weather conditions.
· Tip: Consider providing some shade or wind protection in the first few days after transplanting, especially if the weather is hot or windy. This will help the seedlings adjust to their new environment without additional stress.
Common Mistakes to Avoid During Seedling Removal
1. Rough Handling of Seedlings
One of the most common mistakes is handling seedlings too roughly, which can damage the roots or stems. Always handle seedlings gently by their leaves or cotyledons and avoid pulling them out by the stems.
2. Transplanting Too Early or Too Late
Removing seedlings from trays too early can result in weak plants that aren’t yet ready to thrive in their new location. Conversely, transplanting too late can lead to root-bound seedlings, which struggle to grow after being disturbed. Monitor the growth of your seedlings and transplant them at the right time.
3. Forgetting to Prepare the New Space
Before removing the seedlings from their trays, ensure that the new planting area is prepared. If you wait too long to prepare the soil or containers, the seedlings may experience unnecessary stress when placed in an unfamiliar environment.
4. Ignoring Root Health
When removing seedlings, it’s essential to inspect the root system for signs of damage or root rot. Ignoring root health can lead to poor plant development or transplant failure.
Conclusion: Successful Seedling Removal for Healthy Transplants
Properly removing seedlings from trays is a vital skill for gardeners who want to ensure healthy transplanting. By following the right techniques—handling seedlings gently, inspecting roots, and transplanting them at the appropriate time—you can improve the survival rate and long-term health of your plants. Additionally, providing proper care immediately after transplanting will help seedlings adjust and grow into strong, thriving plants.

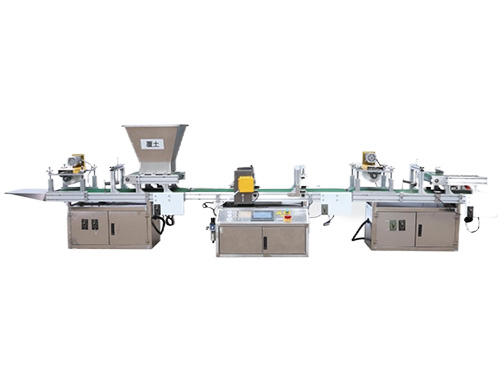
The CNC Seed Braiding Machine is a high-precision, fully automated agricultural equipment s...
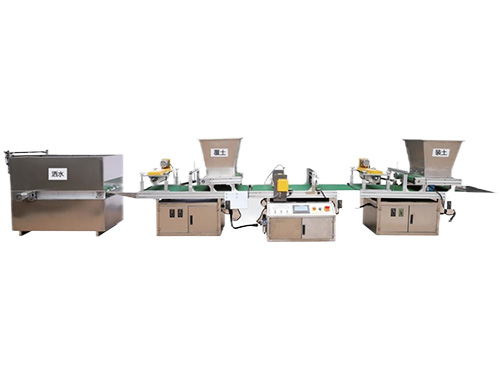
It adopts electrical integration and can be started by pressing the fully automatic button ...
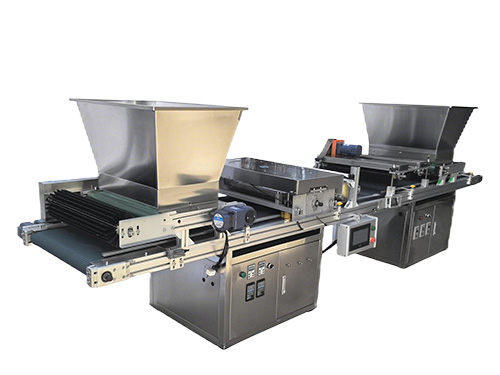
The XP750 seeder has stable performance, excellent product quality, simple and convenient o...
It adopts electrical integration and can be started by pressing the fully automatic button ...