





How to Clean, Sanitize, and Reuse Seedling Trays: The Professional Protocol
2026-08-21 19:12:41
A $15 investment in proper tray maintenance can save you thousands in crop losses and replacement costs. Here's the step-by-step protocol used by professional commercial nurseries to extend tray life to 3–5+ seasons while preventing disease outbreaks.
Why Tray Maintenance Is Non-Negotiable
Every time you grow a crop in a tray, biological material — root fragments, growing medium residue, algae, fungal spores, bacteria, and viruses — accumulates in the cells and on the surface. If left in place, this material becomes:
A reservoir for soil-borne pathogens (Pythium, Phytophthora, Fusarium, Rhizoctonia)
A source of cross-contamination between crops and seasons
A physical barrier that reduces water drainage and root plug quality
The goal of tray maintenance is to remove all organic material and eliminate pathogens — not just make the trays look clean.
When to Clean: Timing Matters
Clean trays immediately after the final transplant from that crop — do not let used trays sit for days or weeks with dried-on growing medium. The longer you wait, the harder the cleaning job becomes:
Immediately after use: Best. Organic material is still moist and easy to remove.
Within 1–3 days: Acceptable. Medium begins to dry and stick.
After 1 week: Difficult. Medium hardens and requires soaking.
After drying completely: Very difficult — may require mechanical brushing and long soaking.
Step-by-Step Cleaning Protocol
1 Remove Growing Medium
Before any water touches the tray, knock out as much dry growing medium as possible. Invert the tray and tap firmly on a hard surface. Use a wooden board or plastic paddle to push medium out from the drainage holes of each cell. This step prevents clogged drains and reduces organic load before washing.
2 Pre-Soak
Stack cleaned trays or place them in a large tank of warm water (not hot — high heat can warp some plastics). Add a commercial tray-cleaning detergent or a mild dish soap. Soak for 30–60 minutes to rehydrate and loosen any remaining medium.
3 Scrub Each Cell
Use a cell brush (a cylindrical brush sized to fit the cell) or a stiff but soft-bristled brush to scrub the inside of every cell. Work from the top down, ensuring all residue is removed from the cell walls and especially the drainage hole at the base. Pay particular attention to the cell corners where medium tends to accumulate.
4 Rinse Thoroughly
Rinse each tray under running water (or in a clean water tank) to remove all soap, detergent, and loosened organic material. Any soap residue left on the tray will be neutralized by sanitizer and reduce its effectiveness. Inspect each tray visually — if you can see any organic material, scrub again.
5 Sanitize
Submerge clean, rinsed trays in a sanitizer solution. Standard options:
Bleach solution: 10% household bleach (1 part bleach to 9 parts water = approximately 5,000 ppm sodium hypochlorite). Soak for 15 minutes. Most reliable for general pathogen elimination.
Quaternary ammonium compounds (Quats): Follow manufacturer's label instructions. Effective against a broad spectrum of pathogens. Leaves a residual antimicrobial coating.
Hydrogen dioxide (e.g., Oxidate, Perasan): Broad-spectrum, relatively safe, breaks down to water and oxygen. Follow label for concentration and contact time.
Steam sterilization: For operations with steam capacity — trays can be steamed at 70°C (158°F) for 30 minutes. Effective but requires specialized equipment.
6 Final Rinse
After sanitation, rinse trays one final time with clean water — especially if using bleach or quats — to remove any chemical residue that could harm seedlings in the next crop. For steam-sterilized trays, no rinse is needed.
7 Dry Completely
Stand trays on their edges or hang them to air dry fully before stacking. Stack trays upside down with a small spacer between stacks to allow air circulation. Ensure trays are completely dry — any remaining moisture will cause mold growth during storage and create condensation issues.
8 Store Properly
Store in a clean, dry, covered space away from direct sunlight, chemicals, and fertilizer bags. UV light degrades plastics over time; chemical fumes (ammonia, chlorine) can weaken or crack trays. Stack evenly on pallets — uneven stacking deforms trays over time.
⚠️ Critical: Never Use Harsh Chemicals on Foam Trays
Polystyrene foam trays are highly sensitive to petroleum-based solvents, strong acids, and many disinfectants. Never use bleach or quaternary ammonium products on foam trays — they will crack, become brittle, and may release toxic compounds. Use only mild soap and water, or products specifically labeled safe for polystyrene.
Sanitizer Comparison
| Sanitizer | Concentration | Contact Time | PET Compatible | Foam Compatible | Key Pathogens Killed |
|---|---|---|---|---|---|
| Sodium hypochlorite (Bleach) | 10% solution | 15 min | ✅ Yes | ⚠️ Caution | Most bacteria, viruses, fungi |
| Quaternary Ammonium | Per label | 10–15 min | ✅ Yes | ❌ No | Broad spectrum |
| Hydrogen Dioxide | Per label | 5–10 min | ✅ Yes | ✅ Yes | Broad spectrum including spores |
| Steam (70°C/158°F) | Full heat | 30 min | ✅ Yes | ❌ No | All microorganisms |
| Isopropyl alcohol (70%) | 70% | 5–10 min | ✅ Yes | ⚠️ Caution | Surface disinfection only |
Expected Tray Lifespan by Material
| Material | Expected Seasons | Key Maintenance Factor |
|---|---|---|
| PET (Haode) | 3–5+ seasons | Avoid harsh solvents; bleach OK; handle to avoid cracking |
| Polypropylene (PP) | 4–6+ seasons | Highly chemical resistant; steam sterilization OK |
| Rigid Polystyrene (PS) | 2–3 seasons | Brittle after repeated cycles; avoid bleach |
| Polystyrene Foam (EPS) | 1–2 seasons | Very fragile; mold release compounds degrade; replace annually |
Visual Inspection Checklist Before Each Season
Before the first sowing of the season, inspect every tray:
☐ No visible cracks, especially at cell bases and tray edges
☐ All drainage holes are open and clear (no blocked holes)
☐ No warping or bending — flat trays fill and water evenly
☐ No residual organic material in cells
☐ No chemical residue or whitening (sign of bleach damage in some plastics)
☐ Cells maintain proper depth and shape for your crop type
☐ Color is uniform (fading can indicate UV degradation)

The CNC Seed Braiding Machine is a high-precision, fully automated agricultural equipment s...
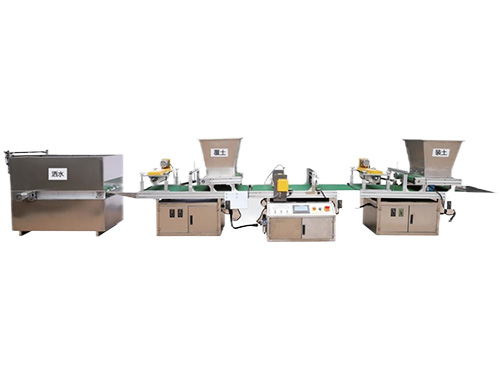
It adopts electrical integration and can be started by pressing the fully automatic button ...
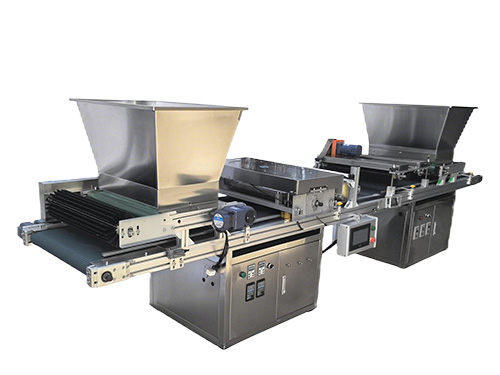
The XP750 seeder has stable performance, excellent product quality, simple and convenient o...
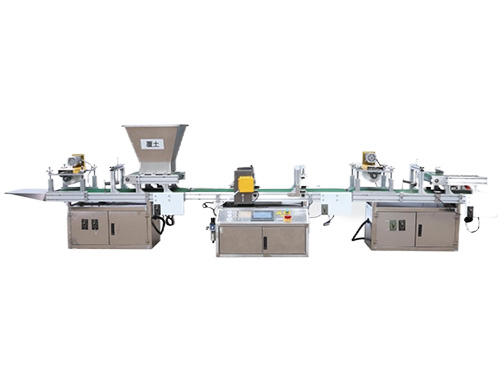
It adopts electrical integration and can be started by pressing the fully automatic button ...