


Soaring Planting Efficiency: The Ultimate Guide to Operating Skills and Practical Tips for Seedling Seeders
2025-06-16 08:04:44
I. Introduction
In the realms of modern agriculture and horticulture, Seedling Seeders have emerged as a cornerstone tool for enhancing planting efficiency. Whether it's mass sowing on large-scale farms or precision planting in home gardens, mastering the operational secrets and practical techniques of Seedling Seeders can significantly streamline the sowing process. This article provides a comprehensive analysis of how to make the most of Seedling Seeders, covering everything from pre-use preparations to actual operation and maintenance, aiming to substantially boost planting efficiency.
II. Overview of Seedling Seeders
(1) Definition and Function
A Seedling Seeder is a specialized device designed for precise seed sowing and seedling cultivation. It utilizes mechanical or automated technology to achieve orderly seed placement. Its core functions include accurately controlling sowing depth, spacing, and seed quantity, thereby creating optimal conditions for healthy seedling growth while significantly improving sowing efficiency and reducing labor costs.
(2) Common Types
Manual Sowers: These have a simple structure and rely on manual operation, making them suitable for small-scale planting scenarios. They are easy to operate and relatively inexpensive.
Semi-Automatic Sowers: Combining human effort with mechanical power, these reduce labor intensity to some extent and enhance sowing efficiency. They are suitable for medium-scale planting.
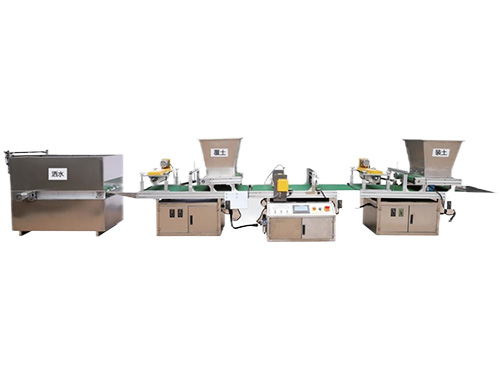
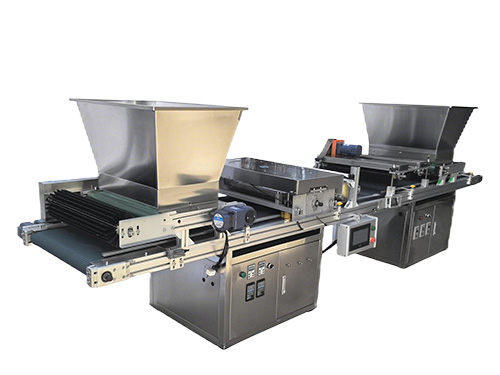
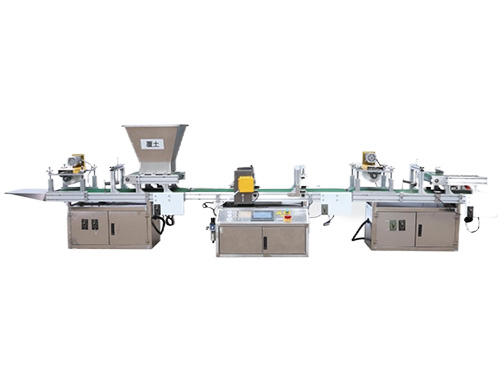
Fully Automatic Sowers: These integrate automation technology to achieve multi-process integrated operations, including sowing, covering soil, and compacting. They are commonly used in large-scale, specialized planting and offer extremely high efficiency and precision.
III. Thorough Preparations Before Use
(1) Seed Pretreatment
Seed Selection: Remove shriveled, damaged, or pest-infected seeds to ensure seed quality and improve germination rates.
Seed Disinfection: Disinfect seeds using methods such as warm water soaking or chemical dressing to prevent disease transmission and lay a foundation for healthy seedling growth.
Seed Germination Acceleration: For seeds with difficult germination, conduct germination acceleration treatments according to their characteristics, such as soaking or constant-temperature germination, to shorten germination time and ensure uniform emergence.
(2) Sower Adjustment
Parameter Settings: Adjust the sower's seed discharge rate, sowing depth, and row spacing according to seed size and planting density requirements. Ensure accurate seed discharge to avoid skipped or double sowing. Set an appropriate sowing depth based on seed characteristics, generally deeper for large seeds and shallower for small ones.
Test Run: Conduct a no-load test run before formal sowing to check for smooth operation of all sower components, abnormal noises, or jamming. Promptly troubleshoot and resolve any issues to ensure the equipment is in optimal working condition.
(3) Site and Tool Preparation
Clearing the Sowing Site: Remove weeds, stones, debris, etc., from the site to ensure smooth sower movement and create a favorable soil environment for seed germination.
Preparing Auxiliary Tools: Have on hand containers for seeds, brushes for cleaning the sower, wrenches for adjusting components, and an appropriate amount of seedling substrate to ensure a smooth sowing process.
IV. Operating Secrets of Seedling Seeders
(1) Standard Operating Postures and Rhythms
Manual Sowers: When holding the sower, keep your arms steady and apply or push with uniform force, controlling the sowing rhythm. Avoid excessive or insufficient force, which can lead to inconsistent sowing depths or uneven seed placement.
Semi-Automatic and Fully Automatic Sowers: When driving or operating the equipment, maintain a steady forward speed to avoid abrupt stops or starts. A consistent speed helps ensure uniform sowing spacing and improves sowing quality.
(2) Precise Control of Seed and Substrate Addition
Seed Addition Timing: During sowing, closely monitor the remaining seed quantity in the seed box. Add seeds promptly when the quantity drops to about one-third of the box's capacity to avoid affecting sowing continuity due to insufficient seeds.
Substrate Addition Points (if applicable): When adding seedling substrate, ensure it is loose and free of lumps, filling the sowing holes evenly. The substrate's moisture content should be moderate, as overly dry or wet substrate can affect seed germination and seedling growth.
(3) Strategies for Dealing with Complex Environments
Handling Different Terrains: On slopes, adopt cross-slope or segmented sowing methods to prevent uneven sowing due to sower inclination. In low-lying areas, pay attention to drainage to avoid waterlogging affecting seed germination.
Adapting to Soil Conditions: Adjust sowing depth and seed discharge rate based on soil moisture and texture. Increase sowing depth slightly in dry soil to ensure seeds contact sufficient moisture. Reduce seed discharge rate in clayey soil to prevent seeds from struggling to emerge due to soil stickiness.
(4) Real-Time Monitoring and Dynamic Adjustments
Observing Sowing Status: Continuously observe the sower's working status during sowing, including smooth seed discharge, consistent sowing depth, and uniform row spacing. Judge sowing quality by observing seed flow in the seed delivery tube and ground traces after sowing.
Timely Parameter Corrections: Immediately stop the machine if issues such as skipped sowing, double sowing, or inconsistent sowing depth are detected. Analyze the causes and make corresponding adjustments, such as clearing blocked seed discharge ports or recalibrating the sowing depth adjustment device, to ensure continuous and precise sowing.
V. Practical Tips for Improving Efficiency
(1) Techniques for Multi-Variety Mixed Sowing (if applicable)
Variety Mixing Principles: When conducting multi-variety mixed sowing, determine the mixing ratio based on crop growth characteristics and market demand. For example, mix tall and short crops to fully utilize space resources, or mix crops with different maturity periods to extend the harvest period and improve economic benefits.
Sowing Order and Methods: Arrange the placement order of different varieties in the sower reasonably and achieve proportional mixed sowing by adjusting the seeders ettings. Methods such as layered sowing or zoned sowing can be used to ensure uniform mixed sowing.
(2) Collaborative Operation with Other Equipment
Using Supporting Equipment: In large-scale planting, coordinate the Seedling Seeder with equipment such as rotary tillers, ridgers, and film mulching machines to form an assembly line operation. For example, use a rotary tiller to plow the land first, then a ridger to form ridges, followed by the sower for sowing, and finally a film mulching machine for covering, significantly improving overall planting efficiency.
Smart System Linkage (if equipped): For sowers equipped with intelligent control systems, link them with greenhouse environmental monitoring systems and irrigation systems. Automatically adjust sowing parameters based on environmental data to achieve precise and intelligent planting.
VI. Maintenance and Care of Seedling Seeders
(1) Daily Maintenance
Thorough Cleaning: After each use, promptly clean the sower of residual seeds, soil, fertilizer, etc. Focus on cleaning key components such as the seeder, furrow opener, and soil cover to prevent clogging and corrosion. Brushes, air blowers, and other tools can be used to assist with cleaning.
Component Inspection: Check the connection parts of the sower, such as screws and nuts, for looseness, and look for cracks in welded areas. Promptly tighten or repair any issues found to ensure the equipment's structural stability.
Lubrication of Key Parts: Regularly apply appropriate lubricants, such as grease or engine oil, to movable parts of the sower, including transmission chains, gears, and bearings. Lubrication reduces friction between parts, lowers wear, and extends the equipment's service life.
(2) Regular Maintenance
Inspection of Worn Parts: Conduct a comprehensive inspection of the sower's easily worn parts at regular intervals, such as the seed disc, duckbill seeder's duckbill, and compaction wheel rubber ring. Observe the wear condition of these parts and promptly replace severely worn ones to ensure sowing accuracy and equipment performance.
Parameter Calibration: Before the start of each sowing season, recalibrate and adjust the sower's parameters, such as seed discharge rate, sowing depth, and row spacing. Conduct actual sowing tests to ensure the equipment's parameters are accurate and meet different planting needs.
Electrical System Inspection (if applicable): For semi-automatic or fully automatic sowers equipped with electrical systems, regularly check for damaged or aged wires, loose plugs, and insensitive sensors. Promptly replace damaged electrical components to ensure the electrical system's safe and stable operation.
(3) Long-Term Storage Maintenance
Deep Cleaning and Drying: After the sowing season, conduct a comprehensive and deep cleaning of the sower to remove all residual substances. Place the equipment in a well-ventilated area to dry, preventing rust and mold due to moisture.
Disassembly and Storage: For detachable parts, such as the seeder and transmission device, it is recommended to disassemble them for separate storage. Mark the parts to prevent confusion and loss, and also facilitate inspection and maintenance before use the following year.
Rust Prevention Treatment: Apply rust inhibitor or conduct anti-rust spray painting on the sower's metal parts, such as the body frame, furrow opener, and soil cover. Rust prevention treatment effectively prevents metal parts from rusting and corroding during long-term storage, maintaining the equipment's good performance.
VII. Common Problems and Solutions
(1) Sowing Faults
Poor Seed Discharge: This may be caused by seeds with shells, impurities blocking the seed discharge port, or a stuck seed discharge wheel. Solutions include cleaning the seed discharge port and channel of debris, checking the seed discharge wheel and adding lubricant, and repairing or replacing worn parts.
Inconsistent Sowing Depth: This may be due to uneven soil, inconsistent resistance of the furrow opener entering the soil, or an unbalanced sower suspension. Solutions include leveling the land, adjusting the furrow opener's entry angle and depth, and calibrating the sower's suspension system.
Skipped or Double Sowing: Poor seed adsorption performance, poor sealing of the seeder, or an unstable transmission system can all cause this issue. Depending on the cause, adjustments can be made, such as adjusting the vacuum degree of a vacuum adsorption seeder, replacing the sealer gasket of the seeder, or checking and repairing the transmission system.
(2) Equipment Damage
Component Wear: Long-term use can cause wear to parts such as the seed disc and furrow opener. For lightly worn parts, grinding and repair may be possible. Severely worn parts should be promptly replaced with suitable new ones, with attention paid to installation accuracy.
Mechanical Failures: Mechanical failures such as broken transmission gears or damaged bearings are often caused by poor meshing, insufficient lubrication, or external force impacts. Repairs require adjusting gear clearances, replacing damaged gears and bearings, and implementing proper lubrication and protective measures.
Electrical Failures (if applicable): Electrical failures such as a non-rotating motor or a malfunctioning control system may be caused by power supply issues, short circuits, or controller damage. Non-professionals should avoid disassembling the equipment themselves. It is recommended to contact professional maintenance personnel for detection and repair.
VIII. Conclusion
Mastering the operating secrets and practical techniques of Seedling Seeders is the key to achieving efficient planting. From meticulous preparations before use to standard execution and flexible responses during operation, as well as daily maintenance and problem-solving, every step is crucial. It is hoped that this detailed introduction can help growers fully leverage the potential of Seedling Seeders, significantly improve planting efficiency, and achieve bountiful harvests, continuously reaching new heights on the planting journey.

The CNC Seed Braiding Machine is a high-precision, fully automated agricultural equipment s...
It adopts electrical integration and can be started by pressing the fully automatic button ...
The XP750 seeder has stable performance, excellent product quality, simple and convenient o...
It adopts electrical integration and can be started by pressing the fully automatic button ...