





How to Use Seedling Trays: A Complete Step-by-Step Guide for Commercial and Home Growers
2026-08-08 17:58:23
Using a plug tray correctly is more than just filling cells with soil and dropping in seeds. This guide walks through every stage — from tray preparation to transplanting — with professional tips for uniform germination and vigorous seedlings.
Before You Begin: What You'll Need
Plug trays (clean, sterilized if reusing)
Seed starting mix (light, well-draining, sterile)
Seeds (test germination rate if old)
Water (clean, pH-adjusted to 6.0–6.5)
Seeding tool (hand seeder, vacuum seeder, or simple hand sowing)
Humidity dome (optional, for germination stage)
Drainage mat or capillary mat (optional, for bottom watering)
1 Prepare the Trays
If using new trays: inspect each cell for flashing (excess plastic) at the base that could block drainage. Remove with a sharp knife or by rubbing with fine sandpaper.
If reusing trays: clean thoroughly with warm water + detergent, scrub each cell, sanitize with 10% bleach solution for 15 minutes, rinse completely, and dry fully before use.
2 Fill Cells with Growing Medium
Use a high-quality, sterile seed-starting mix — not garden soil. Garden soil is too dense and may harbor pathogens. The ideal mix is peat moss or coco coir + perlite + vermiculite.
Technique: Fill the tray by sweeping mix across the top using a board or screed, pressing firmly so the mix settles into cells. Gently tap the tray on the bench to release air pockets. The medium should be firm but not compacted — roots need air in the pore spaces.
Leave a 3–5mm gap at the top of each cell to allow space for watering without overflow.
3 Moisten the Medium Before Seeding
Water the filled trays before seeding, not after. This prevents seeds from being washed down to the bottom of the cell. Use a fine rose attachment on your watering can or a misting nozzle on a hose.
The medium should be moist but not saturated — like a wrung-out sponge. Squeeze a handful: it should hold together but not drip. Overly wet medium suffocates seeds.
4 Sow the Seeds
Drop 1–2 seeds per cell (1 for large, high-germination seeds; 2 for small seeds or uncertain lots). After germination, thin to one seedling per cell using small scissors at the base — never pull seedlings, as this disturbs neighbors.
Planting depth: General rule is 2–3× the seed diameter. Very small seeds (lettuce, petunia, basil) should be surface-sown and lightly pressed into the medium. Larger seeds (peas, beans, squash) go 10–15mm deep.
5 Cover and Label
Lightly cover seeds with a thin layer of dry seed-starting mix or fine vermiculite. Vermiculite is excellent for covering because it retains moisture while allowing light penetration for surface-sown seeds.
Label each tray immediately with variety name, sowing date, and expected germination date. Never rely on memory — variety mix-ups are one of the most common and costly errors in propagation.
6 Create the Germination Environment
Place trays in a warm location or germination chamber. Most vegetable seeds germinate best at 20–25°C (68–77°F). Use a humidity dome (clear plastic cover) to retain moisture. Remove the dome as soon as 50–70% of seeds have emerged — prolonged humidity promotes damping-off disease.
7 Manage Light and Temperature After Germination
Once seedlings emerge, immediately move them to the brightest location available — a greenhouse bench, grow light stand, or sunny windowsill. Seedlings that don't receive enough light become leggy and weak.
Ideal temperature for most vegetable seedlings: 15–22°C (59–72°F). Higher temperatures speed growth but also increase disease risk and water demand.
8 Water Correctly
Check trays daily. Water when the surface of the medium appears dry. Use bottom watering whenever possible — place trays in a shallow pan of water and allow capillary action to draw moisture up. This keeps leaf surfaces dry, dramatically reducing fungal disease.
If overhead watering, use a fine mist early in the day so leaves can dry before evening. Never let trays sit in standing water for more than 30 minutes.
9 Fertilize
Seed-starting mixes contain little to no nutrients. Begin feeding with a diluted liquid fertilizer (half-strength, e.g., 100–150 ppm N) once seedlings have their first true leaves (not the initial cotyledons). Use a balanced fertilizer or one higher in phosphorus for root development.
10 Harden Off Before Transplanting
7–14 days before transplanting, gradually expose seedlings to outdoor conditions: reduce watering, lower temperatures, and increase airflow. If using a humidity dome, remove it entirely. For tender crops (tomatoes, peppers), start by placing trays outside for 1–2 hours in the shade, increasing time and sun exposure daily.
Common Mistakes and How to Avoid Them
⚠️ Mistake 1: Overwatering
The #1 killer of seedlings. Overwatered seedlings develop Pythium root rot ("damping-off") and become vulnerable to fungus gnats. Always check soil moisture before watering — don't water on a schedule.
⚠️ Mistake 2: Insufficient Light
Leggy seedlings with long, weak stems are almost always a light deficiency problem, not a nitrogen problem. Provide at least 14–16 hours of quality light daily. If using grow lights, keep them 5–10 cm above the seedlings.
⚠️ Mistake 3: Seeding Too Deep
Most seeds are planted too deep. If in doubt, err on the shallower side. Very deep planting exhausts seed energy before the seedling can reach the surface and start photosynthesizing.
⚠️ Mistake 4: Ignoring Air Circulation
Stagnant air promotes disease. Use a small fan to maintain gentle air movement in the growing area. This strengthens stems and keeps foliage dry.

The CNC Seed Braiding Machine is a high-precision, fully automated agricultural equipment s...
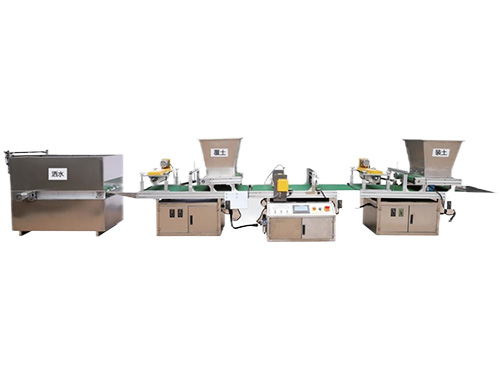
It adopts electrical integration and can be started by pressing the fully automatic button ...
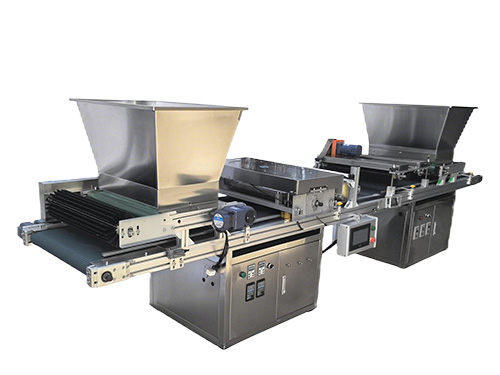
The XP750 seeder has stable performance, excellent product quality, simple and convenient o...
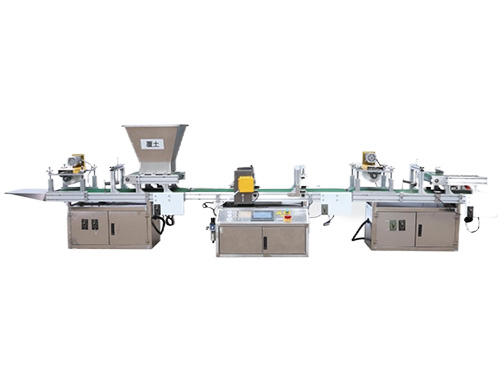
It adopts electrical integration and can be started by pressing the fully automatic button ...