


Troubleshooting Guide for Seedling Seeders: Common Problem Repair Methods and Maintenance Precautions
2025-06-11 02:06:55
I. Introduction
In the process of agricultural and horticultural planting, Seedling Seeders are key pieces of equipment for enhancing sowing efficiency and quality. However, after prolonged use or improper operation, various faults are bound to occur. These faults not only affect the sowing progress but may also lead to a decline in sowing quality and an increase in planting costs. This article will systematically sort out the common faults of Seedling Seeders, provide detailed explanations of repair methods, and share practical maintenance precautions to help users quickly resolve problems and extend the service life of the equipment.
II. Common Sowing Faults and Troubleshooting Methods
(A) Poor Seed Dispensing
Fault Phenomenon: Seeds cannot be discharged normally, or the discharge speed is slow and intermittent.
Cause Analysis
Seeds with shells or impurities mixed in, blocking the seed discharge port or channel.
The seed dispensing wheel is stuck, possibly due to insufficient lubrication, component wear, or the entry of foreign objects.
Improper adjustment of the seed dispensing mechanism, such as setting the seed dispensing quantity too small, making it difficult for seeds to pass through smoothly.
Repair Methods
Immediately stop the machine, clean the seeds and impurities from the seed discharge port and channel to ensure a smooth passage.
Check the seed dispensing wheel, add an appropriate amount of lubricant, repair or replace severely worn components, and remove foreign objects.
According to the characteristics of the seeds and planting requirements, readjust the seed dispensing quantity, conduct a test run until the seed dispensing is smooth.
(B) Inconsistent Sowing Depth
Fault Phenomenon: There are significant differences in the soil penetration depth of seeds sown in the same batch.
Cause Analysis
Uneven soil surface, causing changes in the soil penetration depth of the sower during operation.
Uneven resistance when the trencher enters the soil, possibly due to wear, deformation, or improper installation of the trencher.
An unbalanced suspension system of the sower, causing the entire sower to tilt and affecting the sowing depth.
Repair Methods
Flatten the land before sowing to ensure an even terrain in the sowing area.
Check the trencher, repair worn or deformed parts, reinstall and adjust the soil penetration angle and depth to ensure uniform resistance.
Calibrate the suspension system of the sower, adjust the height of the suspension points to keep the sower level and ensure a stable sowing depth.
(C) Missed or Double Sowing
Fault Phenomenon: Some areas have no seeds sown (missed sowing), or multiple seeds are concentrated in the same area (double sowing).
Cause Analysis
Poor seed adsorption performance, such as insufficient vacuum in a vacuum-adsorption sower, making it unable to effectively adsorb seeds.
Poor sealing of the seed dispenser, leading to seed leakage or additional entry, affecting the accuracy of seed dispensing.
Unstable transmission system, with problems such as loose chains or worn gears, causing irregular operation of the seed dispensing components.
Repair Methods
For vacuum-adsorption sowers, check the vacuum pump and sealing components, adjust the vacuum to an appropriate range, and repair any air leakage points.
Replace aged or damaged sealing gaskets of the seed dispenser to ensure good sealing and prevent seed leakage or misplacement.
Check the transmission system, tighten loose chains, replace worn gears, and ensure stable and precise operation of the seed dispensing components.
III. Equipment Damage Faults and Repair Measures
(A) Component Wear
Fault Phenomenon: Obvious wear is observed on components such as the seed dispensing plate, trencher, and press wheel, affecting sowing accuracy and effect.
Cause Analysis
Long-term use, with frequent friction between components and seeds, soil, etc., leading to surface wear.
Improper operation, such as forcing the sower to work in hard soil, exacerbating component wear.
Repair Methods
Regularly check the wear condition of components. For seed dispensing plates and trenchers with slight wear, they can be polished and repaired; for severely worn components, promptly replace them with suitable new ones.
When replacing components, pay attention to the installation accuracy to ensure that the new components cooperate well with other related components and do not affect the overall performance of the equipment.
(B) Mechanical Faults
Fault Phenomenon: Problems such as broken teeth on transmission gears and damaged bearings occur, with abnormal sounds or stuttering during equipment operation.
Cause Analysis
Poor gear meshing, improper adjustment of the clearance during installation, or long-term use leading to gear wear and misalignment.
Insufficient lubrication, water ingress, or external impact on the bearings, causing bearing damage.
Repair Methods
For transmission gears with broken teeth, if the wear is not severe, they can be repaired; for severely damaged ones, replace them with new gears and readjust the meshing clearance.
Check the bearings. If the damage is due to insufficient lubrication, clean the bearings and add an appropriate amount of suitable lubricant; if the bearings are already damaged, replace them with new ones in a timely manner and take sealing measures to prevent the entry of impurities and moisture.
(C) Electrical Faults (if applicable)
Fault Phenomenon: The motor does not rotate, the control system fails, and the equipment cannot start or operate normally.
Cause Analysis
Power failure, such as broken wires, loose plugs, or damaged power switches.
Short circuits in the wiring, caused by aging, moisture, or poor contact of the wires.
Damage to the controller, possibly due to component aging, overloading, or external interference.
Repair Methods
Check the power connection, repair broken wires, tighten loose plugs, and replace damaged power switches to ensure a normal power supply.
Inspect the wiring, use professional tools to detect short-circuit points, repair or replace damaged wiring, and properly insulate the wiring.
For controller faults, non-professionals should not disassemble it arbitrarily. It is recommended to contact professional maintenance personnel for detection and repair, and replace the controller if necessary.
IV. Daily Maintenance Precautions
(A) Cleaning and Maintenance
After each use, promptly remove residual seeds, soil, fertilizer, and other debris from components such as the seed box, seed dispenser, trencher, and soil cover. Tools such as brushes and blowers can be used for cleaning to prevent the residual substances from corroding the equipment.
For stubborn stains that are difficult to clean, a mild cleaner can be used in conjunction with a soft cloth for wiping. After cleaning, rinse with clean water and ensure the equipment is dry to prevent rusting.
(B) Component Inspection and Tightening
Regularly check the connection parts of the sower, such as screws and nuts, for looseness, and check the welding points for cracks. For loose components, tighten them with a wrench in a timely manner; for cracked welding points, repair them by welding to ensure the structural stability of the equipment.
Check the tension of the transmission chains and belts. If they are loose, adjust them in a timely manner to ensure the normal operation of the transmission system.
(C) Lubrication and Maintenance
Regularly apply appropriate lubricants (such as grease or engine oil) to the key moving parts of the sower, such as the seed dispensing wheel shaft, transmission chains, and trencher rotating shaft, to reduce friction between components and lower the degree of wear.
When lubricating, pay attention to applying it evenly and avoid using excessive lubricants to prevent the adsorption of dust and impurities, which may affect the normal operation of the equipment.
(D) Long-Term Storage Management
After the sowing season, conduct a comprehensive cleaning and maintenance of the sower, thoroughly remove residual substances, and place it in a dry and well-ventilated area to dry.
For detachable components, such as the seed dispenser and transmission device, it is recommended to disassemble them for separate storage and mark them to prevent the loss or confusion of components.
Apply anti-rust agents or conduct anti-rust spray painting on the metal components of the sower, such as the body frame, trencher, and soil cover, to prevent rusting and corrosion during long-term storage.
V. Conclusion
It is inevitable that faults will occur in Seedling Seeders during use. However, by mastering the troubleshooting methods for common faults and strictly implementing maintenance measures, the frequency of faults can be effectively reduced, and repair costs can be lowered. Whether it is sowing faults or equipment damage problems, users can quickly resolve them by following the guide provided in this article, keeping the Seedling Seeder in a good working condition at all times. It is hoped that a more accurate English expression could be "all users will attach importance to equipment troubleshooting and maintenance, give full play to the performance of Seedling Seeders, and escort efficient planting.
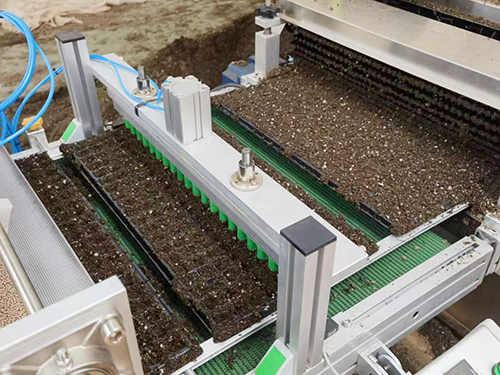
Our state-of-the-art Vegetable and Flower Seedling Seeder is designed to streamline your se...
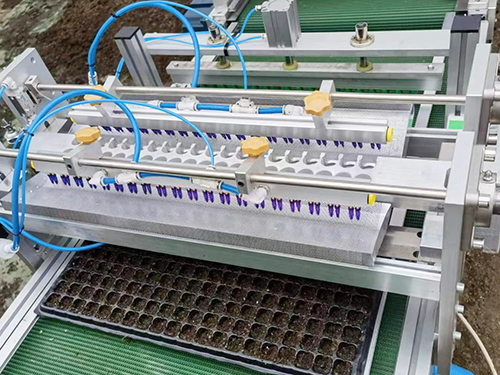
The vegetable seed seedling pressing equipment is a new seedling raising device....
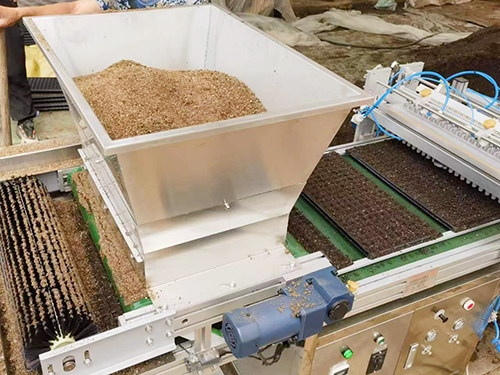
The operation process of the automatic plug tray seedling seeder is to distribute the subst...
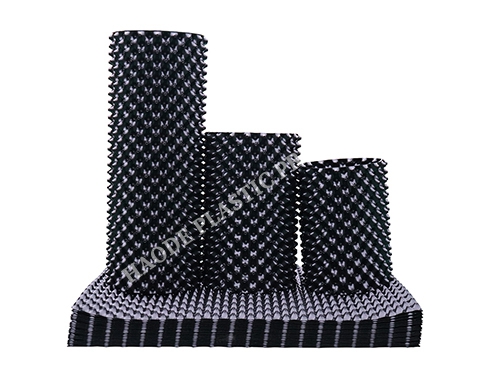
The Root Control Container for Landscaping Seedlings represents a groundbreaking advancemen...