


Precision in Planting: How to Properly Clean and Calibrate Your Seedling Seeder
2025-11-13 18:56:02
The Importance of Precision in Seeding
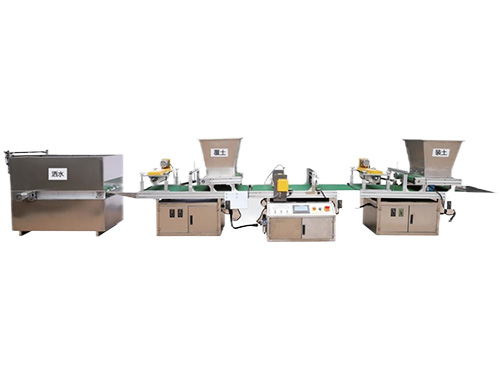
In modern agriculture, precision begins with the seedling seeder. Whether you operate a small greenhouse or manage large-scale crop nurseries, your planting efficiency and seed uniformity depend entirely on how clean and accurate your seeder is.
However, frequent use can cause dust, coatings, and residue to build up inside the system, reducing its metering accuracy. Regular cleaning and calibration are the simplest ways to restore performance and extend the lifespan of your equipment.
With years of manufacturer experience and strong production and bulk supply capacity, we’ve gathered the most effective techniques to help you keep your seedling seeder working at its best.
1. Understanding How Your Seeder Works
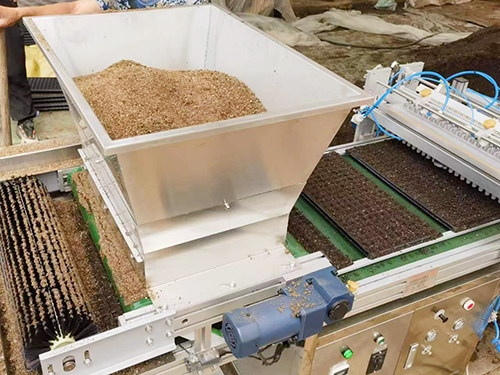
Before cleaning or calibrating, it’s vital to understand how a seedling seeder functions. Most seeders include:
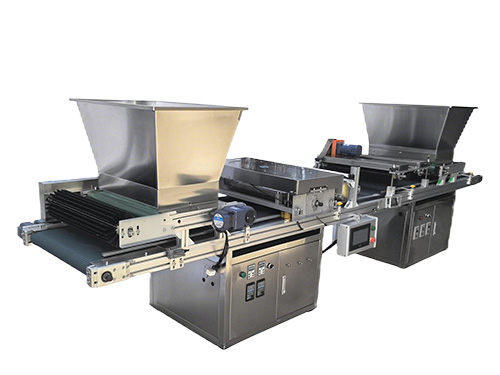
·A seed hopper that holds the seeds before distribution.
·A metering system that controls spacing and seed flow.
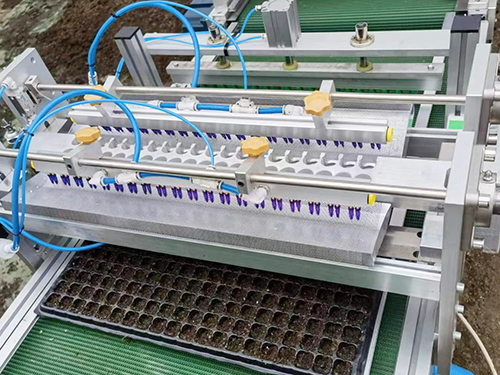
·A delivery system (tubes or suction plates) that ensures one seed per hole.
·A drive mechanism that synchronizes tray movement and seed release.
Knowing how these systems interact helps identify where buildup or misalignment occurs, so maintenance is more effective.
2. Preparation Before Cleaning
Before beginning, always switch off the power or air supply and place the machine on a stable surface. Prepare the necessary tools:
·Soft brushes and compressed air
·Mild detergent and clean water
·Dry, lint-free cloths
·Recommended lubricants from the manufacturer
·Safety gloves and protective goggles
Check your model’s manual to confirm which parts can be safely removed and washed.
3. Step-by-Step Cleaning Guide
Proper cleaning ensures precision, prevents seed blockage, and keeps the seeder running smoothly.
Step 1: Empty and Disassemble
Remove all remaining seeds from the hopper and tubes. Gently detach accessible parts such as seed plates, covers, and suction caps. Keep screws and washers in a safe place for reassembly.
Step 2: Clean the Hopper and Seed Path
Use compressed air or a brush to remove dust and seed coating residue. If oily deposits are present, wipe them off with a mild soap solution and rinse with clean water. Avoid harsh chemicals that could damage the surface.
Step 3: Clean the Metering Unit
Pay special attention to the metering holes or suction points. Even small amounts of residue can affect spacing accuracy. Clean them carefully with a small brush or soft cloth.
Step 4: Dry and Lubricate
After ensuring all parts are completely dry, apply a light coat of lubricant to moving joints, bearings, and shafts. Do not over-apply—excess oil attracts dust and reduces performance.
4. Calibrating the Seeder for Accuracy
Calibration is the process that ensures your seedling seeder plants each seed at the correct spacing and depth.
First, determine the target planting density based on crop type and tray size. For example, lettuce or cabbage may require smaller spacing than tomatoes or peppers.
Next, run a short test using a small quantity of seeds. Observe whether each tray cell receives one seed. If multiple seeds fall into one cell, reduce suction or adjust the metering speed. If some cells remain empty, increase suction slightly or check for blockages.
Finally, record the ideal calibration settings for each seed variety. Keeping a record helps maintain consistency across planting cycles and simplifies future adjustments, especially for large-scale production.
5. Seasonal Maintenance and Storage
Beyond routine cleaning, seasonal care plays a major role in extending your seeder’s lifespan.
Before planting season, replace worn-out seed plates, belts, or bearings. Check that tubes are intact and that air pressure remains stable for pneumatic models.
After the season ends, clean the machine thoroughly and coat any exposed metal with anti-rust oil. Store the seedling seeder in a dry, well-ventilated space, preferably covered and away from direct sunlight or humidity. Proper storage prevents corrosion and ensures a trouble-free start next year.
6. Common Issues and Quick Fixes
Even a well-maintained seeder can show signs of wear or calibration drift. Here are some common problems and their likely causes:
If multiple seeds are dropped into each hole, the suction strength may be too high, or the metering plate may be worn. Adjust the vacuum level or replace the plate if needed.
If the machine skips holes, check for clogged metering points or insufficient suction. Clean thoroughly and retest.
If seed spacing appears uneven, inspect the drive chain or motor speed for fluctuations. Regularly tightening and lubricating mechanical parts keeps everything synchronized.
A noisy operation usually indicates dry bearings—apply fresh lubricant immediately to avoid damage.
7. The Value of a Reliable Manufacturer
Maintaining your equipment is easier when you work with a dependable manufacturer that offers standardized production and bulk supply. Reliable suppliers provide precision-built seed plates, durable materials, and ongoing technical support, ensuring compatibility and consistent performance.
Partnering with such manufacturers helps reduce downtime, simplifies maintenance, and guarantees access to genuine replacement parts when needed. It’s a long-term investment that safeguards the accuracy and durability of your seedling seeder.
Conclusion: Precision Starts with Care
A clean and calibrated seedling seeder is the cornerstone of accurate planting and uniform crop growth. By establishing a regular cleaning schedule, performing seasonal inspections, and recording calibration results, you ensure consistent planting efficiency year after year.
Combined with the backing of a trusted manufacturer that provides high-quality production and bulk supply, your seeder can deliver exceptional precision and reliability for every planting cycle.
With proper care, your equipment won’t just last longer—it will keep your entire seeding operation running efficiently and consistently, helping every seed realize its full potential.
References
GB/T 7714:Mishra D, Satapathy S. Reliability and maintenance of agricultural machinery by MCDM approach[J]. International Journal of System Assurance Engineering and Management, 2023, 14(1): 135-146.
MLA:Mishra, Debesh, and Suchismita Satapathy. "Reliability and maintenance of agricultural machinery by MCDM approach." International Journal of System Assurance Engineering and Management 14.1 (2023): 135-146.
APA:Mishra, D., & Satapathy, S. (2023). Reliability and maintenance of agricultural machinery by MCDM approach. International Journal of System Assurance Engineering and Management, 14(1), 135-146.
It adopts electrical integration and can be started by pressing the fully automatic button ...
The XP750 seeder has stable performance, excellent product quality, simple and convenient o...
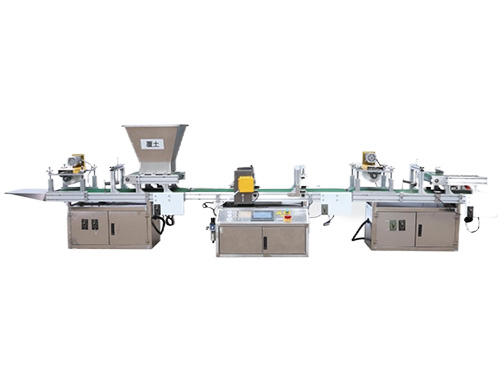
It adopts electrical integration and can be started by pressing the fully automatic button ...
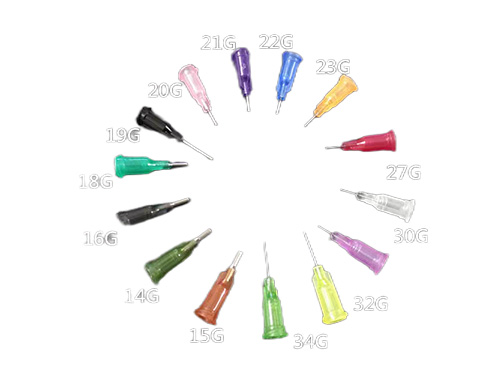
Needle list Seed nozzle model Different models Sowing types are different...